HOW TO STRETCH A CANVAS

So, you wanna stretch a canvas...
First, lets start with a supply list:
Go to your local Art Supply Store (avoid the chains that focus on crafts, they will try to sell you a prestretched canvas, and most don't even carry stretchers!--even the ones who offer painting classes!)

Also, at the Art Supply Store you can buy canvas inexpensively. You may also get it at your local Fabric Store. At the Art Supply Store, don't fret, student grade canvas will work fine. You will be building up the surface with gesso, so whatever you use, make sure the weave is thick and strong. The texture of the cloth will grab the gesso, and the weave should be able to withstand being stapled and pulled.
I use a small staple gun because it is a little easier to wield. (My staple gun is Stanley Light Duty Sharpshooter that uses 5/16" staples, but yours should work.) Some folks do this with a nail gun... but not me.
Before you leave the Art Store, buy a bucket of gesso. This will be the priciest item maybe up to $20, or less if you can find a smaller bucket than mine. With one small prestretched canvas averaging at about $25, this bucket of gesso is a deal. It will cover many, many, canvases.
Let's get started...
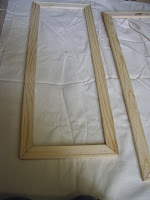
Now, you have to cram them together. Use force & caution, if you break the little sliver of wood that wedges them together, it's not the end of the world, but it probably is the end of that stretcher. If it's difficult, that is good. It means they won't be loose, and move out shape once you "square" it. Ocassionally, you get a corner that is a little loose fitting. Deal w/ this by cramming a little thin piece of balsa wood in the slit, or use the nice little pre fabricated wooden or plastic spacers that are available at the art store FOR FREE when you buy the stretchers. (They may or may not be offered to you, but if you ask, they will be given to you.) After a little back and forth, wiggling the pieces together, you can use the floor to push against to slide them together the rest of the way if necessary. Don't worry if the corner isn't 90 degrees, that will come later, just get them together: 
Then, you will want to keep it from moving any more.
Secure it, w/ staples and or those balsa wood (or plastic) spacers I mentioned.

Once you have cut out a piece of canvas to fit your frame you will want to make sure the side of the frame that you want to be the back is UP ontop of the canvas. It shouldn't matter which side of the canvas is up, but if it matters to you, make sure the side of the cloth you want to paint on is facing DOWN.
Next, fold the material over the frame and secure it with one staple in the middle of the stretcher. Don't worry about these first ones being tight, for now just secure each side:


(I space my staples about 1"- 2" apart on the first pass and then go around the already tightened areas again and give another pull, and stapling between my 1st pass)
 Grab the canvas, Pull the Canvas, Staple, & Work your way around
 Get as close to the corners as you can while still being able to manipulate and fold the cloth. There are lots of different ways to fold the corners, you'll find the easiest and best looking ones for yours. My corners look messy on the back of the canvas, but I never worry about the back.
 After you cut away excess fabric (yes you can do that now), fold the corner and secure it.
 Corners are the hardest part! Don't despair, refold as much as you need to, and don't staple till you like it! Your corners will be fabulous, and remember no one cares if the back is messy.

VOILA! Look I did 2!!
I did the first coat of gesso today too, I'll post that tomorrow, and I will show all the other steps to get them ready to paint on. So, Come Back! Let me know how your first try goes, & GOOD LUCK!
YOU CAN DO IT!
Make your painting more than just a craft. Paint on a canvas you have stretched yourself and you will know you are an Artist. ;D


1 comments:
Great tutorial! I don't think I even have any questions- Thanks!
Post a Comment